 Photographs are some of the best souvenirs you can bring back from vacation. Hang around here long enough and you’ll know I am a big proponent of taking as many pictures on your vacation, specifically your Disney vacation, as possible. The more the merrier!
Before we dive into how to access your photos once they are purchased, let’s dive into a few Disney photo terms and what they mean. Having this background information will help you keep things straight. Plus, make it easier for you to ask questions to cast members should any come up.
What is the Memory Maker vs PhotoPass?
PhotoPass is the ‘service’ Walt Disney World offers for taking photos of guests throughout their parks and properties. You’ll see PhotoPass photographers throughout the parks available to take snapshots of guests.
Disney’s PhotoPass also refers to the website online where guests can see all of their photos from their days in the parks.
Memory Maker is the name of the package you buy, which grants you access to all the digital files of the photos from your trip. The photos that were taken by the PhotoPass photographers.
One of the best ways to bring home all the pictures (and to make sure everyone is in the shot), is by purchasing the Memory Maker. You can learn all about the Memory Maker right here.
Yes, I know, that was probably confusing. Disney tends to use the words PhotoPass and Memory maker interchangeably. It’s kind of a cyclical system because the photos that comprise the Memory Maker are called PhotoPass photos. They are all the individual photos taken by the PhotoPass photographers in the Walt Disney World parks and Disney Springs.
The main thing to remember is Memory Maker is the package deal. It’s how you get all of your Walt Disney World photos from your trip.
Do You Need to Purchase Memory Maker to Access the PhotoPass Photos?
You do NOT need to purchase the Memory Maker in order to get access to the PhotoPass photos. Typically, if you plan to purchase a lot of PhotoPass photos, the Memory Maker is going to be the best deal.
However, at times, you might find yourself only wanting one or two of your PhotoPass photos. You are able to purchase these photos individually! Woohoo!
How Do You Access the Photos from Disney’s PhotoPass?
Either way, if you purchase the Memory Maker and receive all the photos from your vacation or purchase a handful of PhotoPass photos individually, how will you download said photos?
It’s easy peasy! And can be done on your phone or tablet or on a desktop computer. Let’s dive in and learn the steps for downloading any PhotoPass photos.
How to Download Disney PhotoPass Photos in 4 Easy Steps
First, let’s explore how you can access the PhotoPass photos from a desktop computer. Then we will dive into accessing the photos from the mobile app and go into a few more details about the photos.
Downloading Disney PhotoPass Photos from Desktop
Go to My Disney Experience, making sure you are logged in to your Disney account.
Next, once you are logged in, go to the right-hand side of the screen and select the ‘MyDisneyExperience’ dropdown.
Click on ‘My Photos’, located near the bottom of the drop-down menu. Once the page loads with all of your photos, select the photos you would like to download. You can select a single photo or all the photos from that day or even your whole vacation.
If you opt to select all the photos, be sure to purchase the Memory Maker. Don’t buy each photo individually. You can price it out, but odds are it is going to be a better deal to get all the photos. There is also a one day Memory Maker option available if you’d like all the photos from one day specifically. Again, be sure to price it out, but odds are it will be a better deal to buy them all than purchasing each photo individually.
Proceed to check out and complete your purchase!
Accessing PhotoPass Photos from the My Disney Experience Mobile App
Now, let’s explore how to download photos from the My Disney Experience Mobile App.
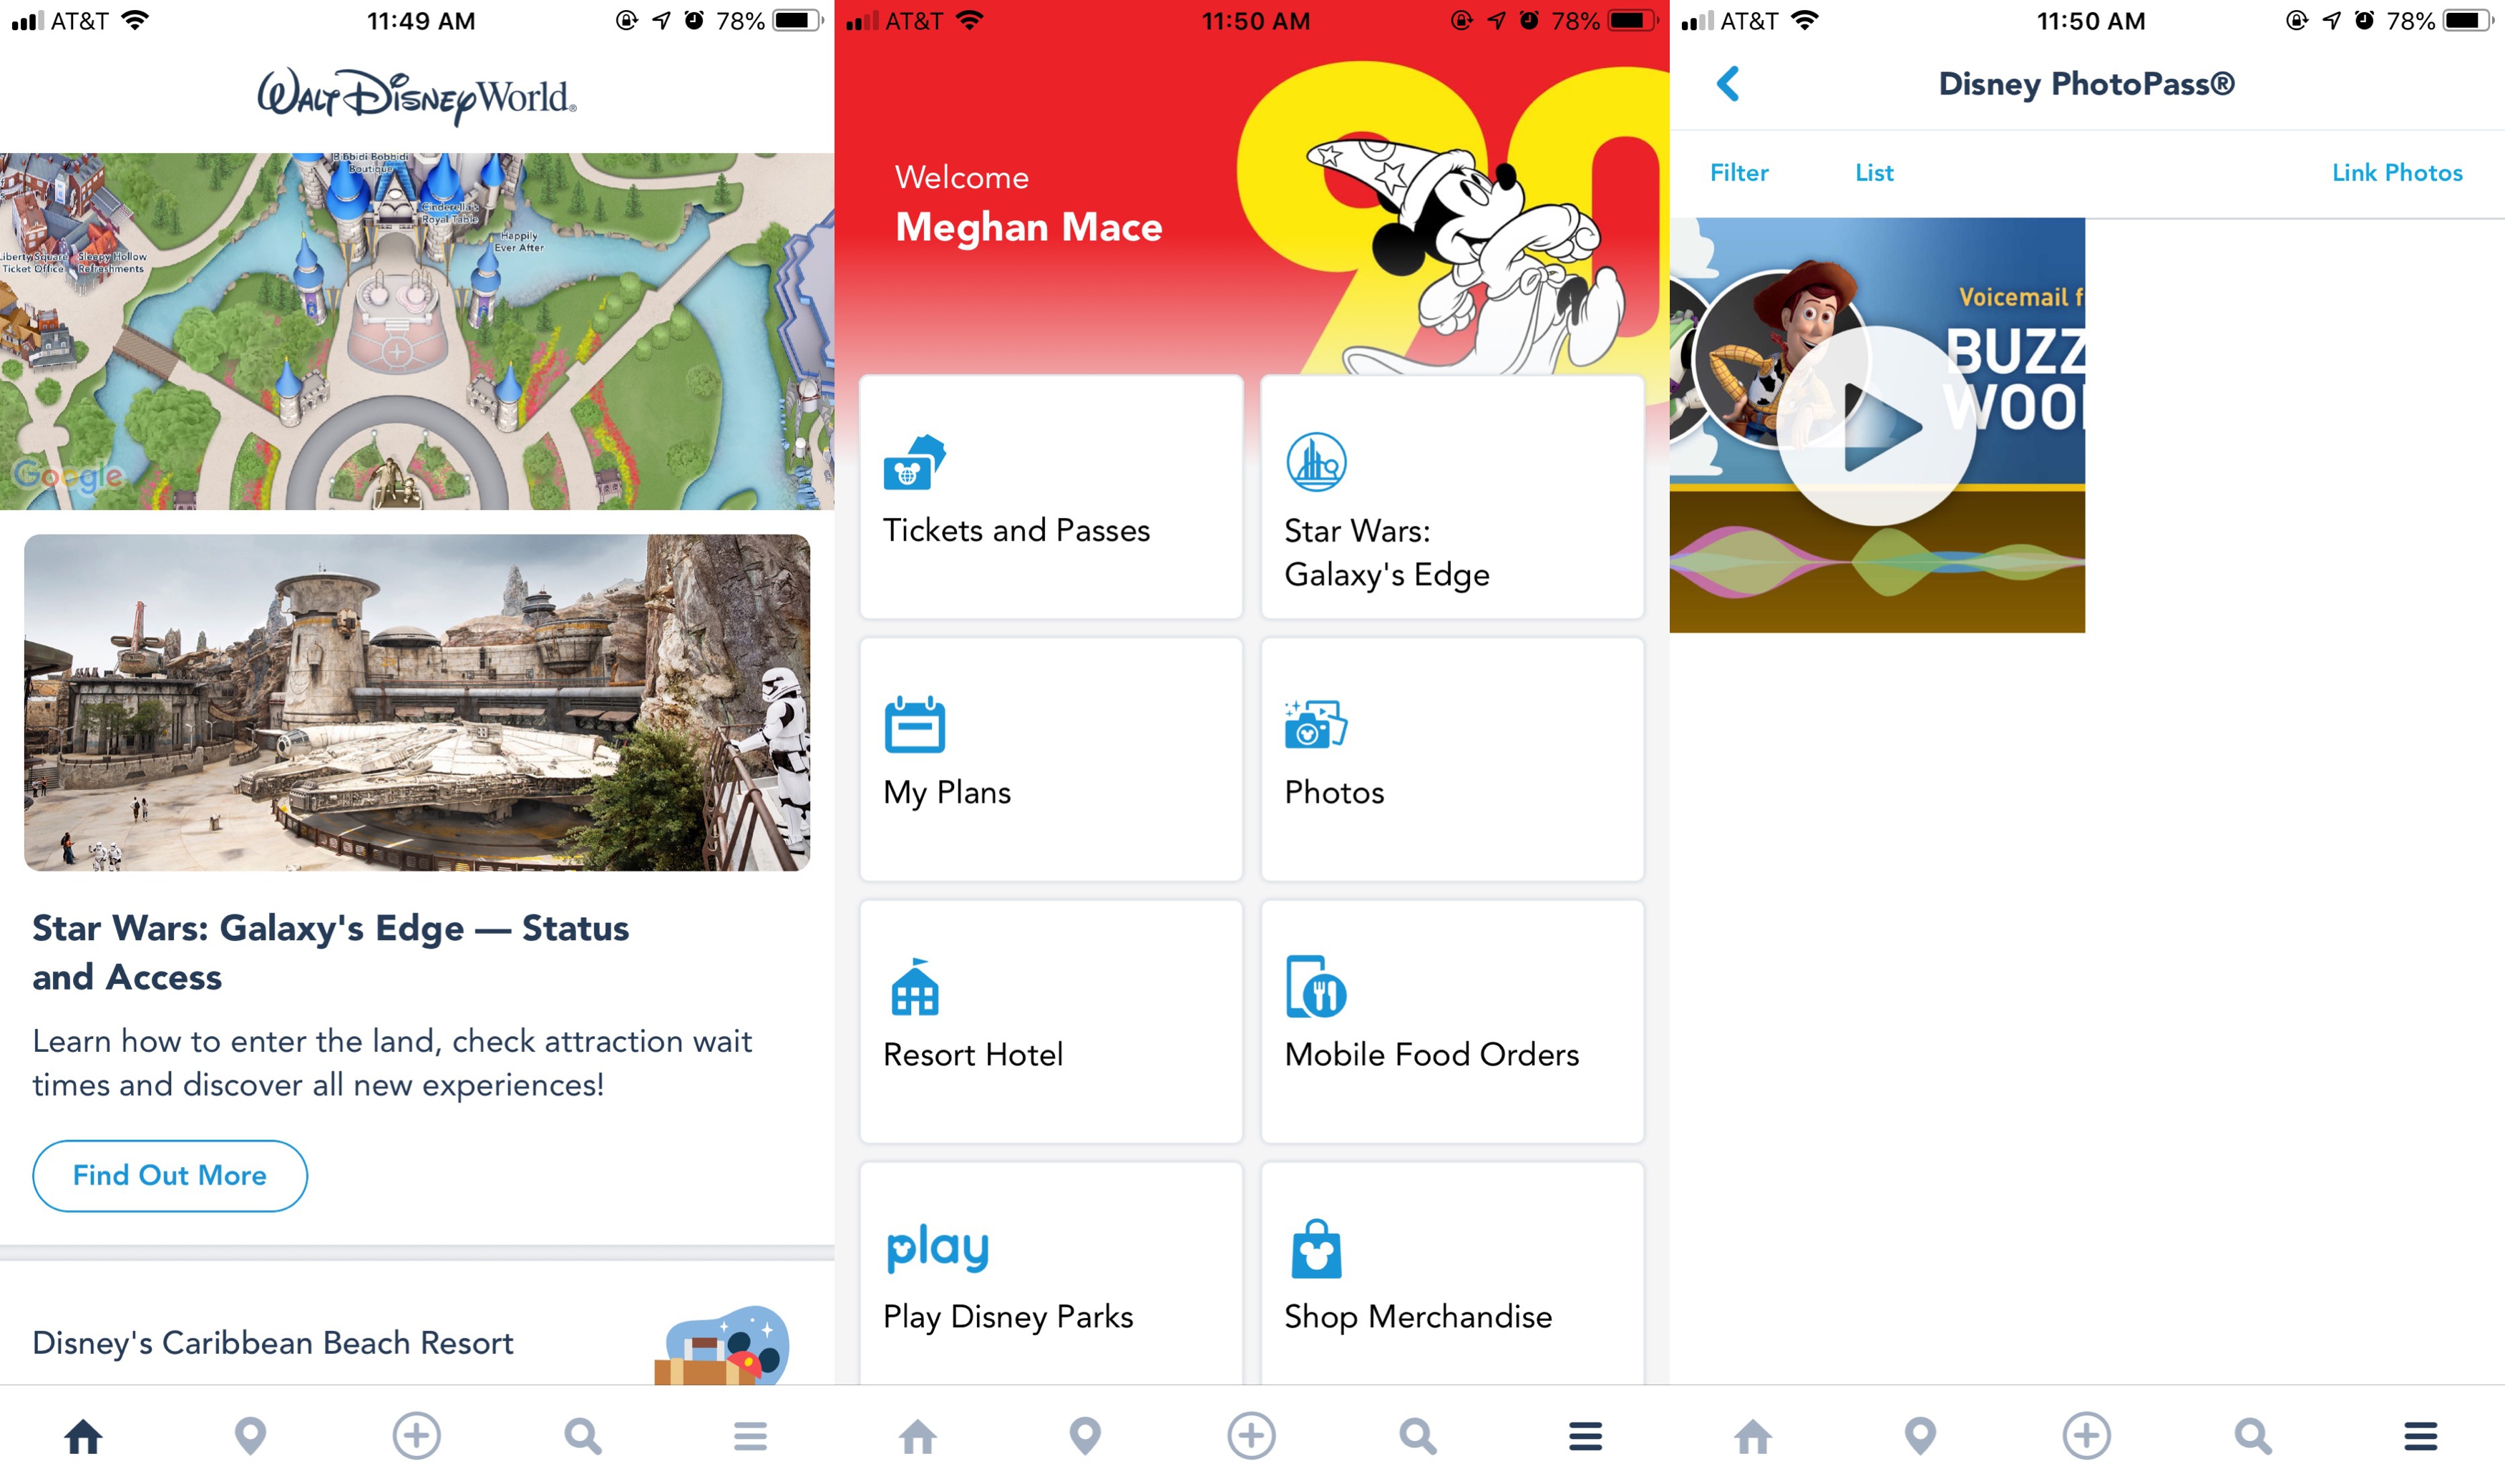
First, open the My Disney Experience App. If you don’t have the app already downloaded, be sure to do so. Aside from having access to your park photos, the My Disney Experience App is going to help you keep track of things like Fastpass+ reservations and dining reservations. It’s a huge tool provided by Disney and so helpful when you are in the parks.
Once you are in the app, be sure to select the three bars at the bottom of the app home page. A new screen should come into view that gives different options, including the ‘Photo’ option. Select the photo option and you will be able to view all your photos from the parks.
If you don’t see the photos you are looking for, be sure you linked all of the photos. There is a tab at the top of the page that gives you the option to ‘Link Photos’. Photos are linked by having Disney PhotoPass photographers scan your MagicBand or by linking a PhotoPass card inside your ‘My Disney Experience’.
From here, click on a photo, you will be given the option to purchase it, edit the photo, share it (once purchased) and so forth.
PhotoPass Photo Pro Tip: How to Find Lost PhotoPass Photos
If for some reason you aren’t able to find a photo you know that you did indeed link to your My Disney Experience, do not fret. Not all hope is lost! If you go ahead and give the Disney PhotoPass Guest Support a call at (407) 560-4300.
Try to remember the specifics of your missing photo including location, (approximate) time taken, what you were wearing and anything else that might be helpful for staff to find the photo. The more details the better in helping the Disney Cast Member find your photo. Hopefully, Disney will be able to find a missing photo. They have been really helpful and successful in the past!
Editing Disney PhotoPass Photos Prior to Download
As mentioned before, once you have found your photos within My Disney Experience, you will notice you are able to edit said photos. Editing includes simple editing features such as cropping and adding a simple filter. Plus you can add borders or stickers to the photos as well. Be sure to click the checkbox in order to save your work once complete.
DisneyParks Video: How to Download Disney PhotoPass Photos
If you are more of a visual person (I know I am!), you can see how to download Disney PhotoPass photos directly from Disney. Catch this DisneyParks video created by Disney to see a step-by-step approach.
Conclusion for How to Download Disney PhotoPass Photos
There ya go! How to download Disney PhotoPass photos, all spelled out for you! Now you also know the difference between Disney’s PhotoPass and Disney’s MemoryMaker. You should be all set to let the amazing Walt Disney World PhotoPass photographers capture your priceless vacation memories.
If there are any other PhotoPass or MemoryMaker questions, be sure to leave a comment below. Or if you still have questions on how to download Disney PhotoPass photos. We are happy to help make sure those memories make it safely to your hands!
Now that you know all about ‘How to Download Disney PhotoPass Photos’, learn more about other Disney World photo related details. If you haven’t already, learn more about the MemoryMaker here and learn about the best places to get crowd-free Cinderella Castle photos.
Plus, learn 4 legit ways to get your PhotoPass photos downloaded for free. Check out that blog post here.
Let’s Be Friends! Follow Me on Facebook, Instagram, and Pinterest: @magicformiles. Can’t wait to see you there!


